Recently I had a chance to take a closer look at relatively new tool for creating interactive iPad tablet reading experiences called iBooks Author. It was released by Apple in January 2012 and is aimed at book authors and publishers to allow for an easy publishing of their books on Apple iBook platform. Application supports its own format .ibooks as well as .pdf and .ePub formats for exporting.
But what really caught my attention was the possibility to embed interactive elements inside actual ebooks. It can be done in the form of HTML5 widgets, with CSS styling and JavaScript support for building interactivity. As it was a good fit for one of interactive digital mobile content projects we will be crafting at PopularOwl and I went through the process of creating and adding HTML5 widget to iBook project to understand how it all comes together.
In this tutorial I’m going to walk you through the steps for building fully working HTML5 widget to be used in iBooks Author projects. This sample widget will help eBook authors to easily add social follow option to their digital books so their readers can interact from within the eBook.
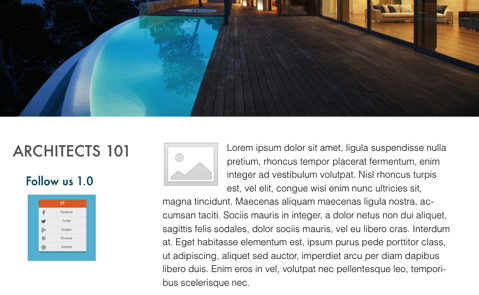
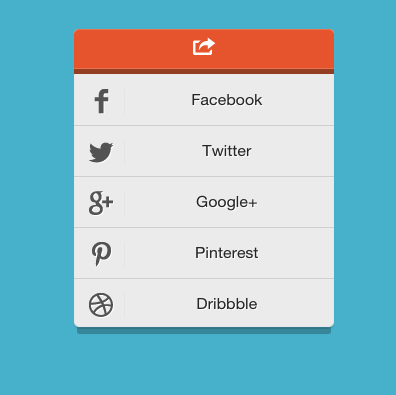
Source code for finished widget project is located at the bottom of this tutorial, feel free to download and test it. The final result:

What is HTML5 widget?
HTML5 widgets have .wdgt file format and are packaged sets of markup, style, JavaScript and configuration files. Apple recognizes .wdgt type directories as widgets on their OSX operating system and, as we will learn, on some mobile development tools as well. Simply speaking these widgets are just standard directories with additional extensions in their name. Such widget directory must contain certain files in it to work as functioning widget but more about it latter in this tutorial.
Tools for creating HTML5 widgets
As widgets are just simple directories containing HTML, CSS, JavaScript and .plist files there are no requirements to use specific tool to create or edit them. Any text editor will do as long as it can open and edit these file types. I personally use Coda 2 but I’m sure you have your preferences.
For automated HTML5 widget creation Apple have a tool called Dashcode.
But for purposes of this tutorial we are going to create all files manually as we want to understand how widgets are build.
Lets get going!
There are 3 required files you have to supply in order to create working HTML5 widget. Main HTML file with .html extension (no naming limitations on this one), Default.png – the image file which will be displayed to users on the eBook page (this has to be named exactly like this and is case sensitive) and Info.plist file for storing widget settings – also has to be named exactly that.
For this tutorial I’m going to use example code of HTML5 dropdown menu which is styled with simple CSS styles and has a little bit of jQuery for interactive part. It looks like this:

HTML5 widgets for iBooks have great support for JavaScript scripting language, its libraries and CSS styles (though I was not able to find exact specifications on any Apple developer sites). In my index.html I have the following markup:
<!DOCTYPE html>
<html>
  <head>
    <meta http-equiv="Content-Type" content="text/html; charset=utf-8" />
    <meta http-equiv="X-UA-Compatible" content="chrome=1,IE=9" />
    <meta name="viewport" content="user-scalable=yes, width=600" />
    <script src="jquery.js" type="text/javascript"></script>
    <title>DropDown</title>

    <style>

        body {
            background: #55bed5;
            font-family: 'Helvetica Neue';
            font-weight: lighter;
        }

        ul {
            margin: 0;
            padding: 0;
        }

        li {
            list-style-type: none;
            margin:0;
            padding: 10px 0;
        }

        a {text-decoration: none; color:#333;}
        p {margin: 0;padding: 0; clear:none;text-shadow: 1px 1px #fff;}

        #menu {
            width: 260px;
            background: #efefef;
            margin: 30px 0px 0px 70px;
            border-radius: 5px;
            box-shadow: 0 10px 0 -3px rgba(0,0,0,.2),0 2px 0 rgba(0,0,0,.1);
            -webkit-transform: scale(.8);
            -moz-transform: scale(.8);
            -ms-transform: scale(.8);
            -o-transform: scale(.8);
            transform: scale(.8);
            -webkit-transition: all .3s ease;
            -moz-transition: all .3s ease;
            -ms-transition: all .3s ease;
            -o-transition: all .3s ease;
            transition: all .3s ease;

        }

        #menu:hover {
            -webkit-transform: scale(1);
            -moz-transform: scale(1);
            -ms-transform: scale(1);
            -o-transform: scale(1);
            transform: scale(1);
            -webkit-transition: all .3s ease;
            -moz-transition: all .3s ease;
            -ms-transition: all .3s ease;
            -o-transition: all .3s ease;
            transition: all .3s ease;
        }

        .share {
            text-align: center;
            padding: 5px;
            background: #ed6b3a;
            border-radius: 5px 5px 0 0;
            border-bottom: 5px solid rgb(218, 109, 63);
        }

        .share:hover {

            border-bottom: 5px solid rgb(165, 80, 45);
            box-shadow:inset 0 -1px 0 rgba(255, 255, 255, .2),
            inset 0 1px 0 rgba(255, 255, 255, .2);

        }

        .content {height: 0;overflow: hidden ;opacity:0;}
        .show {
            height: 253px;
            opacity:1;
        }

        li {
            box-shadow: 0 1px 0 rgba(0,0,0,.1);
            position: relative;
            padding: 15px;
            text-align: center;
        }

        li img {
            padding-right: 10px;
            margin-right: 10px;
            float: left;
            border-right: 1px solid #eaeaea;
        }

        li:hover {background: rgba(20, 20, 20, 0.1)}

        li:hover,.share:hover,.content {
            -webkit-transform: translate3d(0, 0, 0);
            -moz-transform: translate3d(0, 0, 0);
            -ms-transform: translate3d(0, 0, 0);
            -o-transform: translate3d(0, 0, 0);
            transform: translate3d(0, 0, 0);
            -webkit-transition: all .6s ease;
            -moz-transition: all .6s ease;
            -ms-transition: all .6s ease;
            -o-transition: all .6s ease;
            transition: all .6s ease;

        }

        .show {
            -webkit-transition: all .6s ease;
            -moz-transition: all .6s ease;
            -ms-transition: all .6s ease;
            -o-transition: all .6s ease;
            transition: all .6s ease;
        }

    </style>

</head>
<body>

<script type="text/javascript">
    $( document ).ready(function() {
    $(".share").click(function (e) {
      $('.content').toggleClass('show');
      e.preventDefault();
    });
    });
</script>

<div id="menu">
    <a href="#"><div><img src="img/N3osT4l.png" alt=""></div></a>
    <div>
        <ul>
            <a href="#"><li><img src="img/sEKPZan.png"><p>Facebook</p></li></a>
            <a href="#"><li><img src="img/wefpyCe.png"><p>Twitter</p></li></a>
            <a href="#"><li><img src="img/TIhzUN3.png"><p>Google+</p></li></a>
            <a href="#"><li><img src="img/UpTP5kJ.png"><p>Pinterest</p></li></a>
            <a href="#"><li><img src="img/IGNnYUg.png"><p>Dribbble</p></li></a>
        </ul>
    </div>
</div>

</body>
</html>
As you can see this is pretty simple example which requires jQuery library and several images to be present. For our purpose I have downloaded the latest version of jQuery library and packed images in to separate img directory within projects main dir. Now we have to create Info.plist file which is used for storing settings and has its own XML format. If you are new to Apple developer world I recommend you to Google and read more about this specific XML format as you are going to find it in every development project if its to do with iOS / MacOSX. Its not overall complicated. In the mean time here is the content of my Info.plist file
<?xml version="1.0" encoding="UTF-8"?>
<!DOCTYPE plist PUBLIC "-//Apple//DTD PLIST 1.0//EN" "http://www.apple.com/DTDs/PropertyList-1.0.dtd">
<plist version="1.0">
<dict>
    <key>AllowNetworkAccess</key>
    <true/>
    <key>CFBundleDevelopmentRegion</key>
    <string>English</string>
    <key>CFBundleDisplayName</key>
    <string>DropMenu</string>
    <key>CFBundleIdentifier</key>
    <string>com.popularowl.widget.ibook</string>
    <key>CFBundleName</key>
    <string>DropMenu</string>
    <key>CFBundleShortVersionString</key>
    <string>1.0</string>
    <key>CFBundleVersion</key>
    <string>1.0</string>
    <key>Height</key>
    <string>400</string>
    <key>MainHTML</key>
    <string>index.html</string>
    <key>Width</key>
    <string>400</string>
</dict>
</plist>
Its quite self explanatory as each setting has a name and the corresponding value. In order to create Default.png image I took a print screen of HTML5 menu example displayed by the web browser. One note here: if you haven’t declared the widget size in your Info.plist file (we did) the dimensions of Default.png image will be used as the size for your widget. Make sure you are specifying the right height and width for your project.
Once all files are created we need to add extension .wdgt to project directory. This is done by simply renaming directory (MacOSX will ask you to confirm and you just say yes).
Whats left now is to open iBooks Author application, start the new eBook project and choose to insert widget from the top menu. Once you get dialog window there will be some pre made widgets as well as HTML option at the bottom of the list. Once selected it will give you a container within iBook where you can drag & drop your newly created widget. You should now see a preview of functioning dropdown menu. Connect your test iPad device, hit preview and welcome to interactive eBooks world.
Conclusions
HTML5 widgets are simple way to make digital eBooks more interactive. In my opinion the strong side is that you can reuse HTML5 and JavaScript content from other mobile or web projects you worked on with simply adopting already existing code to the screen size etc. And of course remember that eBook is not a smartphone game, so be cautious with overloading it with to much interactivity.
Source code for sample widget can be found here.
4 Responses
Well done! Great you got it all working !
Thanks Roman and cheers for intro to iBooks Author widgets
Ask two questions
1.html5 widget can be run automatically in the iBook file? Like the “yellow submarine”.
2 in the iBook file playback of HTML5 widget program is full?
Thank you.
How do you stop the html5 widgets from opening up full screen?