We continue the tutorial about building static websites with an 11ty site generator.
In the previous part, we created a static website structure, configuration, pages, and links. This tutorial part is about adding CSS styles, dynamically generated pages, and dynamically generated sitemap.
CSS Styles
Let’s remember what was the structure of the website code at the end of the previous tutorial part.
/
└── 11ty-static-website
    ├── content
    │   ├── _includes
    │   │   └── base.njk
    │   ├── about.md
    │   ├── index.md
    │   └── blog
    │       ├── blog-post-a.md
    │       ├── blog-post-b.md
    │       └── blog-post-c.md
    ├── .eleventy.js
    └── package.json
To add styles we will create a new directory under the content directory called css. It will hold our stylesheet files.
In this directory create a file called bundle.njk. Notice the extension of this file. It’s not an actual stylesheet itself, but rather the template.
Through this template, we will instruct the 11ty generator to combine a few CSS files into one single stylesheet file. It’s a good mechanism which allows us to split CSS stylesheets into meaningful pieces and produce only one style file during static website generation.
---
permalink: /css/bundle.css
eleventyExcludeFromCollections: true
excludeFromSitemap: true
---
{% include "content/css/reset.css" %}
{% include "content/css/variables.css" %}
{% include "content/css/styles.css" %}
{% include "content/css/syntax.css" %}
A few things are happening in this template.
permalink specifies the final location of the output CSS file after it is generated. All include statements import separate CSS files from the css directory.
You can find and copy all CSS files mentioned in the above snipped from the example code repository on GitHub.
Next, for the 11ty generator to copy the final CSS file over to the destination we will have to insert the addPassthroughCopy configuration to the .eleventy.js (see the directory structure).
// 11ty setup
module.exports = function(eleventyConfig) {

    // passthrough paths
    eleventyConfig.addPassthroughCopy("content/css/bundle.css");

    // minify html output
    eleventyConfig.addTransform("htmlmin", function(content, outputPath) {
        if( this.outputPath.endsWith(".html") ) {
            const minified = minify(content, {
                useShortDoctype: true,
                removeComments: true,
                minifyJS: true,
                collapseWhitespace: true
            });

            return minified;
        }
        return content;
    });

    // custom shortcodes
    eleventyConfig.addShortcode('version', () => `${+ new Date()}`);
    eleventyConfig.addShortcode('year', () => `${new Date().getFullYear()}`);
    eleventyConfig.addShortcode('build', () => `${new Date().toISOString().split('T')[0]}`);

    return {
        dir: {
            input: 'content',
            includes: '_includes',
            output: 'dist'
        },
        markdownTemplateEngine: 'njk',
        htmlTemplateEngine: 'njk',
        dataTemplateEngine: 'njk'
    };
};
In addition to addPassthroughCopy, you will notice I added a couple of new functions to the file.
eleventyConfig.addTransform allows us to transform the HTML during generation. In our case, we want to minify it (reduce the size of HTML pages).
eleventyConfig.addShortcode adds the short codes, we can use within the template pages across 11ty projects.
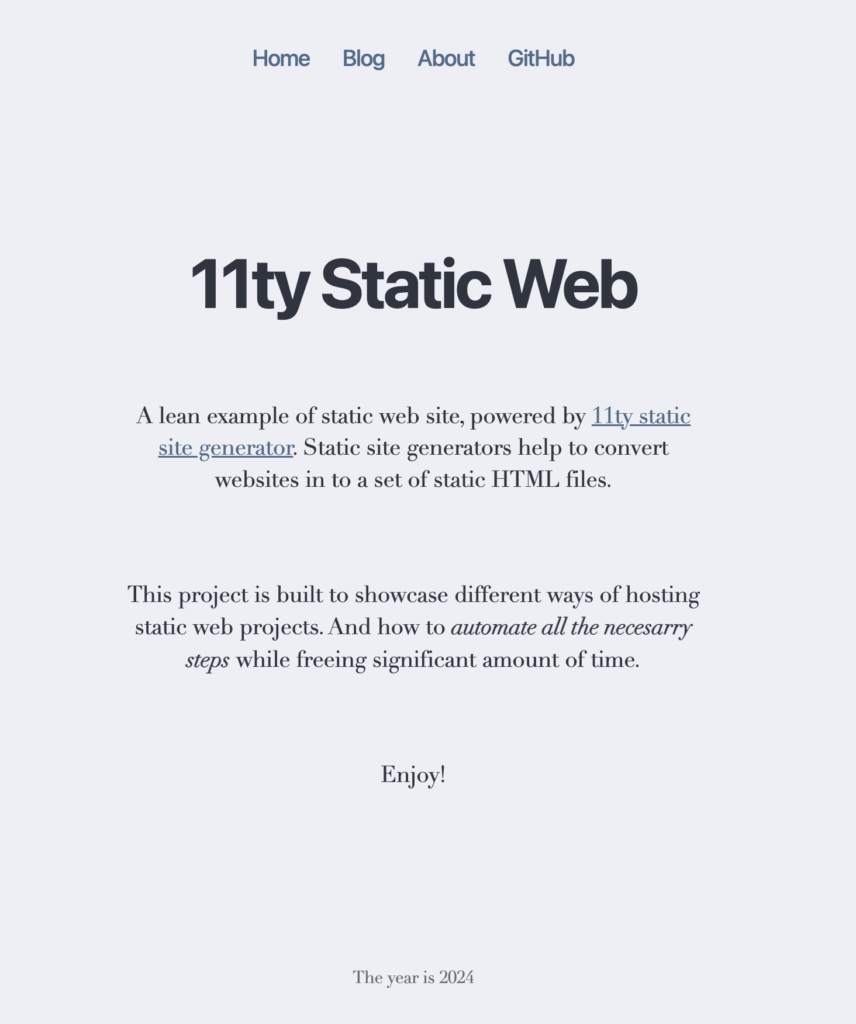
Once you copy all CSS files from the reference project, your website should now have lean styling and look something like this
Sitemap
Next, we will add a sitemap.
Add the file called sitemap.njk to the content directory. This file is a template, which has logic for how the actual sitemap XML file is generated. Here are file contents.
---
permalink: /sitemap.xml
excludeFromSitemap: true
---


  {%- for item in collections.all %}
    {%- if item.data.excludeFromSitemap !== true %}

        https://localhost:8080{{ item.url }}
        {{ item.data.lastmod or item.date | formatDate('yyyy-MM-dd')  }}
        {%- if item.data.changefreq %}
          {{ item.data.changefreq }}
        {%- endif %}
        {%- if item.data.priority %}
          {{ item.data.priority }}
        {%- endif %}

    {%- endif %}
  {%- endfor %}
We are using the Nunjucks templating language to iterate through the static website pages collections array provided by 11ty.
And if posts do not have the excludeFromSitemap variable set true we include them in to sitemap XML file. Relatively simple setup.
Add RSS feed
RSS feed is a way to provide an updated feed for your website to the people who want to subscribe and receive notifications about new content.
11ty provides a simple plugin that lets us dynamically generate such feed during build time.
First, you have to install the plugin and save it to your package.json while running this
npm install @11ty/eleventy-plugin-rss --saveThen upgrade eleventy.js with plugin configuration
// 11ty setup
module.exports = function(eleventyConfig) {

.....

    eleventyConfig.addPlugin(feedPlugin, {
		type: "atom", // or "rss", "json"
		outputPath: "/feed.xml",
		collection: {
			name: "blog",
			limit: 10,
		},
		metadata: {
			language: "en",
			title: "11ty static website",
			subtitle: "Minimal static 11ty website",
			base: "https://localhost:8080/",
			author: {
				name: "Popularowl",
				email: "", // Optional
			}
		}
	});
 .....

};
Your RSS feed should now be present as feed.xml
Summary
This 2 part tutorial covers the basics of using an 11ty static website generator to build blog-type websites. You can always visit the official 11ty documentation to get more detailed insights.
Full source code for the static website we created (together with some improvements) is present in the open GitHub repository. Give it a star if you find it useful.
Leave any questions/feedback in the comments section below.

Post Your Comment